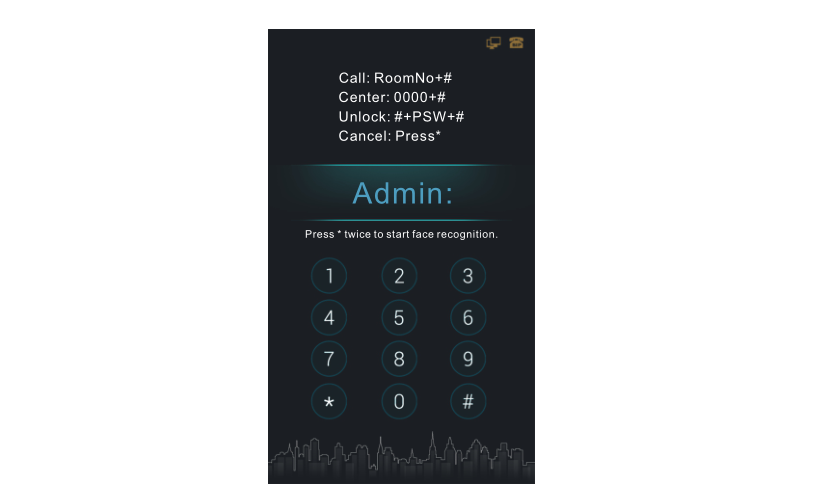
Pressing the "#" key twice, LCD display will show as below. Enter six-digit admin password(default password: 123456) and go to settings.
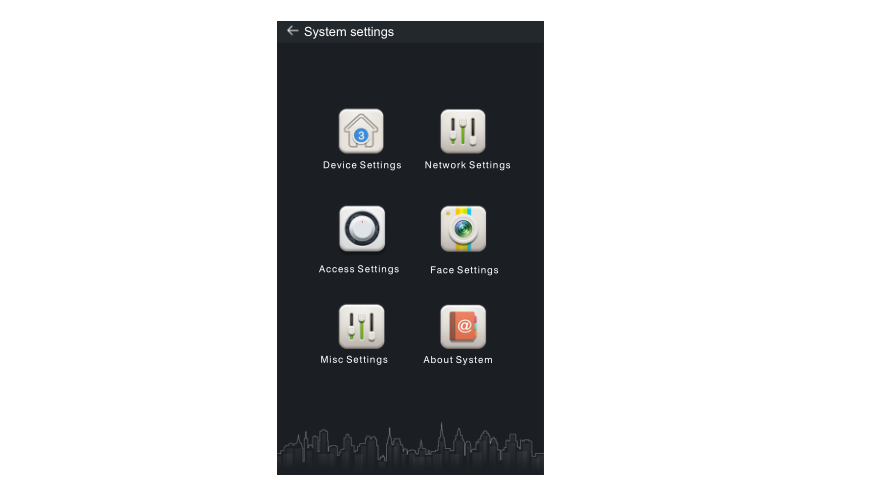
In System Settings page, you can set the following items.
1. Device settings
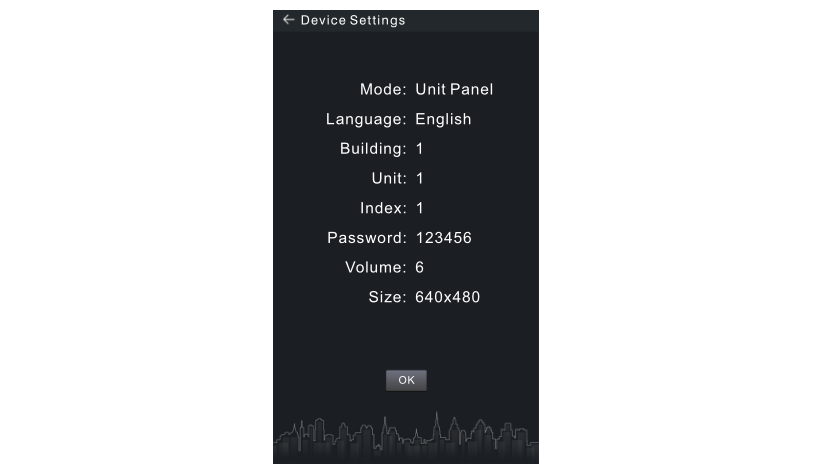
Press to enter the following setting interface:
1.1 Device Mode
The device can be used as unit panel or wall panel. The device mode can be set through the item "Mode".
Press “OK” to confirm after inputting. When the door station gives an indication tone, it means that it is changed successfully. If the device is used as unit panel, it can only call the indoor monitors in this unit. If the
device is used as wall panel, it can call all the indoor monitors in the whole
community.
1.2 Language, Volume and Size
The language, volume and size (resolution) are set in the same way as the settings of device mode. "Language" is used to set the language to be shown on the door station, supporting simplified Chinese, English,traditional Chinese and Spanish. "Volume" is used to set the prompt tone of door station, including 1-6 volume levels selection. There is 320x240,640x480 or 1280x720 for the size.
1.3 Building No., Unit No., Index and Password
Select the item to set Input the number to change Press “OK” to confirm. When the door station gives an indication tone, it means that it is changed successfully.
Note: Please keep the admin password confidential. If the password is forgotten, the user will not be able to log into the system. The password can only be recovered by resetting to factory defaults.
2. Network Settings
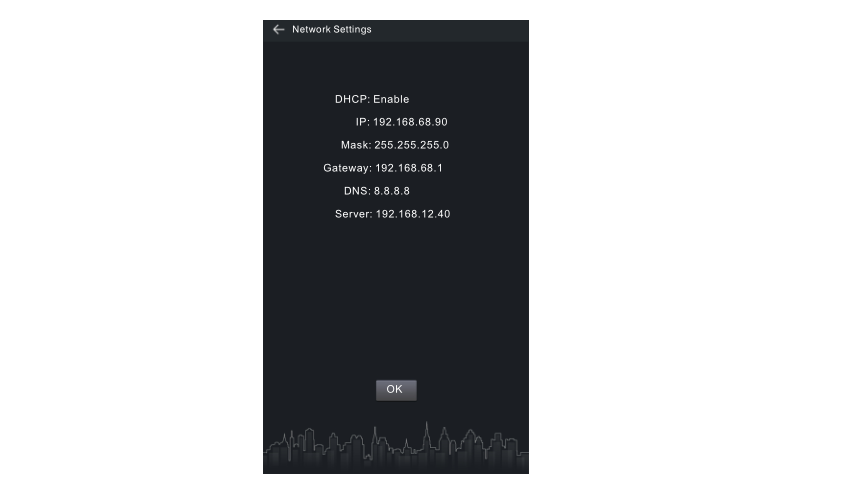
Press to enter the following setting interface:
2.1 DHCP
Select this item to go to settings. Press “OK” to confirm after inputting. When the door station gives an indication tone, it means that it is changed successfully. The user can enable or disable the function.
2.2 IP
The default IP address of the system is 192.168.68.90. The LCD screen will display as shown above. As for the devices which are connected on the same LAN (the same subnet of network segment), their IP addresses
cannot be the same.
2.3 Mask
The system default is 255.255.255.0. The LCD screen will display as shown above.
2.4 Default Gateway
It refers to the gateway address for network segment of device’s IP address. The system default is 192.168.68.1. The LCD screen will display as shown above.
2.5 DNS
The system default is 8.8.8.8. The LCD screen will display as shown above.
9 9
2.6 Server
The server address refers to the IP address of computer with management software. In case that management software isn’t required for managing the intercom devices, this setting is invalid. The default IP
address of server is 192.168.12.40. The LCD screen will display as shown
3. Access Settings
Press to enter the following setting interface:
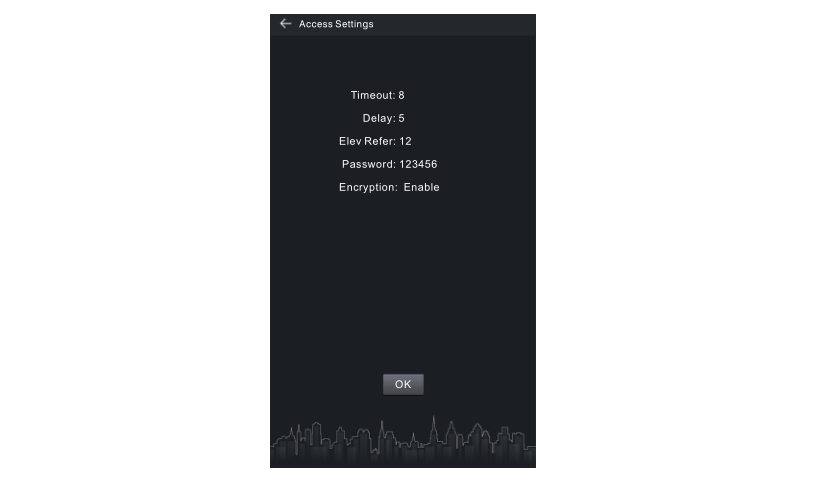
3.1 Timeout
The item is used for controlling the unlocking time, namely, how long it will take the door to shut automatically after unlocking. Select this item to go to settings. Input any number from 1 to 9. If the user
enters the number 8, it means the unlocking time is set at 8 seconds. Press“OK” to confirm after inputting. When the door station gives an indication tone, it means that the time is changed successfully.
Input any number from 1 to 9. If the user enters the number 8, it means the unlocking time is set at 8 seconds. Press “OK” for confirmation after inputting. When the outdoor panel gives an indication tone, it means that
the time is changed successfully.
3.2 Delay
The item is used for setting the delayed opening time, meaning how long it will delay unlocking the door after the user presses the unlock button on the indoor monitor.
Select this item to go to settings. The LCD screen will display as shown above. Input any number from 1 to 9. If the user enters the number 5, it means the delayed opening time is set at 5 seconds. Press “OK” to confirm
after inputting. When the door station gives an indication tone, it means that the time is changed successfully.
3.3 Password
The item is used for setting the password to unlock the door. Press this item to go to settings. Press “OK” to confirm after inputting. When the door station gives an indication tone, it means that it is changed successfully.
3.4 Elev Refer (This item can only be used after connection to elevator control devices)
The item is used for setting the floor No. of door station.Select this item to go to settings. The LCD screen will display as shown above. Set the floor No. of door station ranging from 01 to 99. After the
door is unlocked, the elevator will reach the floor of door station. Press “OK”to confirm after inputting. When the door station gives an indication tone,it means that it is changed successfully.
3.5 Encryption
Select this item to go to settings. Press “OK” to confirm after inputting.When the door station gives an indication tone, it means that it is changed successfully. The user can enable or disable the function.
4. Face Settings
Press to enter the following setting interface:
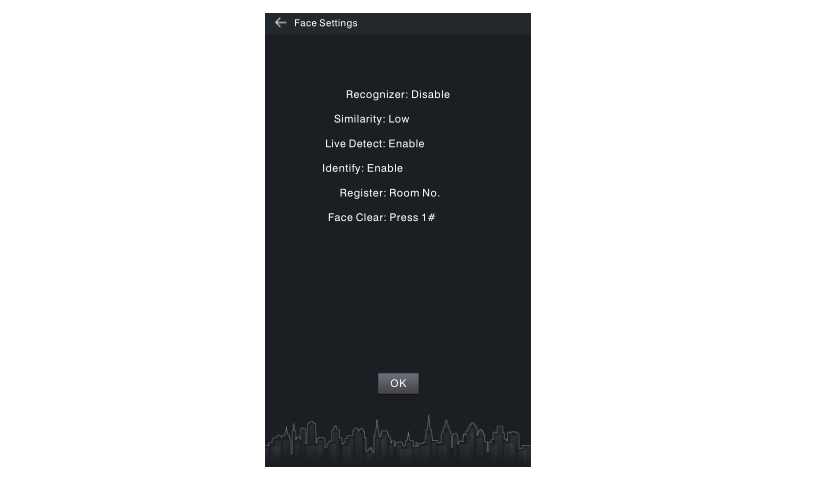
The item “Recognizer” is used for setting the state of recognizer function.“Disable” means the function has been closed. Press this item to go to settings. Press “OK” to confirm after inputting. When the door station gives an indication tone, it means that it is changed successfully.
The item “Similarity” is used for setting the face similarity. There are 3 levels to choose.
The item “Live Detect” means if you can move when being recognized.
The item “Identify” is used to enable or disable continuous face recognition.
The item “Register” is used for recording the new face. Enter the Room number and then register the face on the system of door station. When the system gives a prompt tone, it means the registration is completed.
The item “Face Clear” is used for clearing the registered information. Enter"1#" and then press “OK” to confirm.
5. Misc Settings
Press to enter the following setting interface:
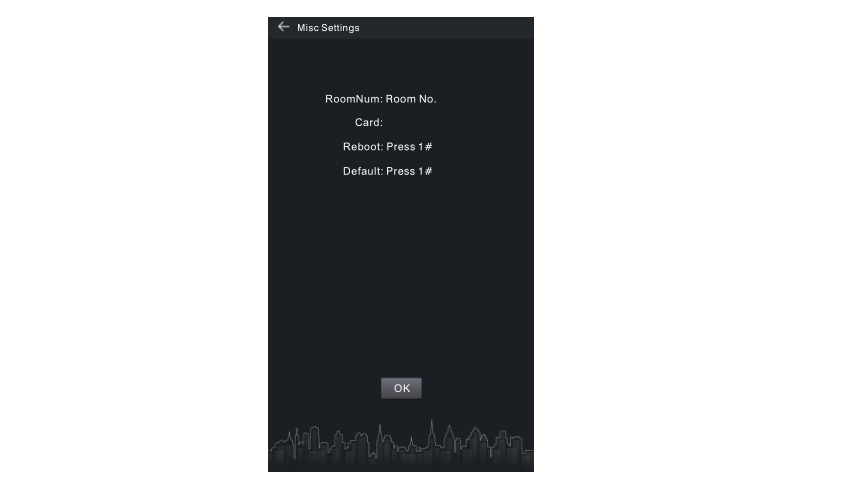
The item “RoomNum” is used for registering the access card corresponding to the room number. Select this item to go to settings. Press “OK” to confirm after inputting. When the door station gives an indication tone, it means that it is changed successfully.
Enter the room number and then place the access card close to the card reader area. When the door station gives an indication tone, it means that the card has been registered successfully. Then the No. of registered card will be displayed.
The item “Reboot” is used for restarting the door station. Enter the number“1#” and then press “OK” to confirm. The system will restart automatically.The item “Default” is used for resetting to system default. Enter the number“1#” and then press “OK” to confirm. The system will be reset.
6. About System
Press to enter the following setting interface:
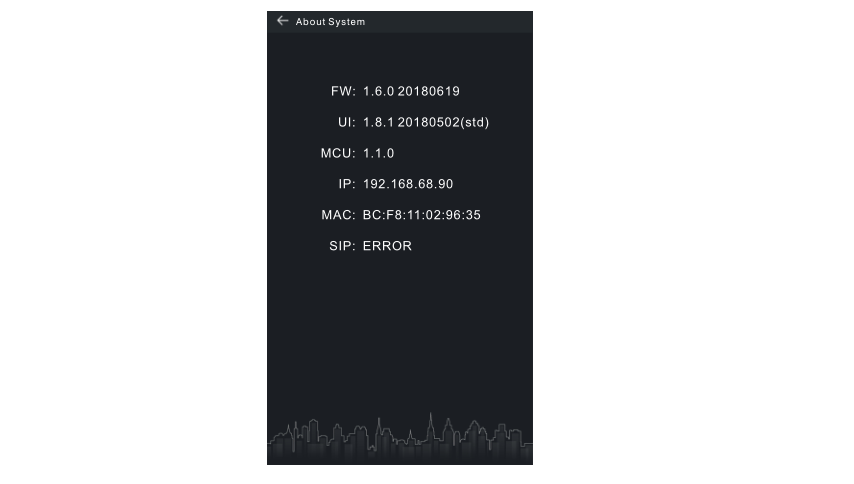 You can look over the relevant information.