Connect door station and PC to the network switch on the same LAN. Input IP address of door station in the web browser of PC, then input the user name and password(the default name is admin, the password is 123456) to enter into the following interface:

1. Network Settings:
Click “Network” icon on the interface to enter into the following interface:

IP: IP address should be unique on the same Network.
Mask: the default Mask is 255.255.255.0.
Gateway: it depends on IP address.
DNS: it depends on Network.
Server IP: it is the same as the IP address of management PC.
Password: it's used for connecting management PC.
Usually, the communication among master station, indoor monitor and door station will be available on the same LAN; if they are not on the same network, you need to set SIP server to support the communication.
Click “Submit” icon to confirm settings.
2. Device Settings:
Click “Device” icon on the interface to enter into the following interface:
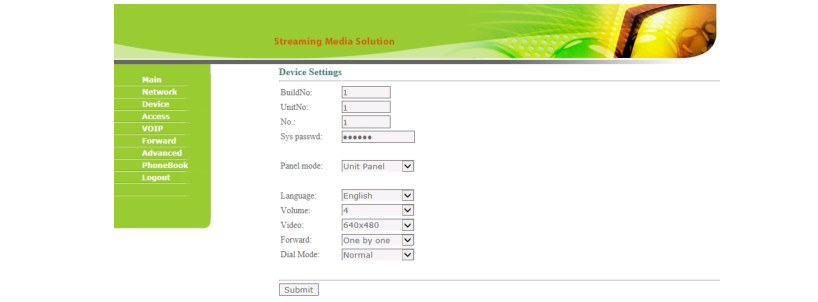
The settings of Building and Unit No. should be the same as that of corresponding door station.
No.: It is unique number for the door station. You can have max.9 door stations in one house, and you need to distinguish their numbers from 1 to 9.
Sys password: you can change the login password as you like (the default password is 123456).
Panel mode: unit panel, wall panel or outdoor panel for selection. Language selection: only support simplified Chinese and English. System volume: adjust the system volume with 6 levels for selection.
3. Access Settings:
Click “Access” icon on the interface to enter into the following interface:
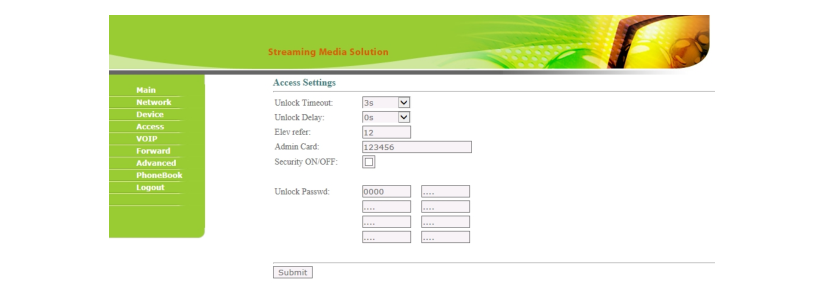
Unlock Timeout is used for controlling the unlocking time ranging from 1 to
9 seconds.
Unlock Delay refers to the delayed opening time ranging from 0 to 9
seconds.
Elev refer is used for setting the floor No. of door station ranging from 01 to
99.
Security ON/OFF: arming/disarming by card is only available for secondary
door station; unit panel only supports disarming by card.
Unlock Password: it’s used for unlocking the door. The system default is
0000. Eight unlocking passwords can be added.(This is only applicable for
door station with keypad.)
Card Registration:
The Admin Card is used for registering user card. There are two ways to
register the admin card:
1. The user enters card No. of the admin card in the box after “Admin Card” and then clicks “Submit” to finish the registration of the admin card.
2. If the user isn’t aware of admin card No., please enter 0 in the box first and click “Submit”. Then place the admin card close to the card reader area.When the system gives an indication tone, it means that the card is registered successfully.
When registering the user card, the user should swipe the admin card first. The system emits a beep. Then place the card to be registered near the card reader area within 10 seconds. If the system gives an indication tone, it means that the user card is registered successfully. When registering the user card, the card to be registered should be swiped 10 seconds after the admin card is swiped. Once a user card is registered, it will postpone for 10 seconds. When there is no activity for 10 seconds, the system will exit from registration status automatically. To register a new user card, the user should swipe the admin card again.
4. VOIP:
Click “VOIP” icon on the interface to enter into the following interface:
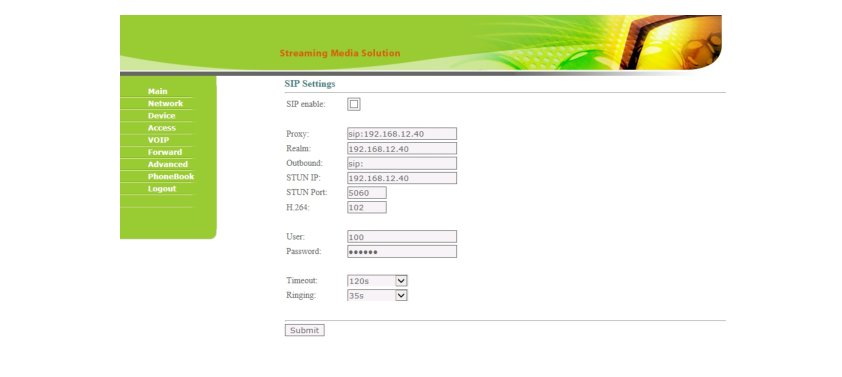
SIP enable: when SIP account No. is enabled, the SIP server of a third party is used.
Proxy: URL of SIP proxy server in format: sip:ip or sip: domain name.
Realm: realm of the device, generally the same as IP or domain name.
STUN IP Port and refer to the IP and port of public server for NAT traversal of audio and video.
User: user name assigned by SIP server
Password: password assigned by SIP server
Timeout: 120 seconds, 300 seconds, 600 seconds, 1200 seconds or 1800 seconds.
Ringing: ringing time of indoor monitor which is called by door station can be set. The time can be set at 35 seconds, 45 seconds, 60 seconds, 90 seconds or 120 seconds.
Once this is set up, click the key “Submit” to enable new settings.
5. Forward (Call transfer):
Click “Forward” icon on the interface to enter into the following interface:

Room No. can be bound with phone number. When the visitor calls on the door station but there is no answer within 25 seconds, the system will forward the call to the phone. Please follow the detailed steps:
1. Enter the room No. and then enter the account phone number to be bound;
2. To delete this account, check the box;
3. Once this is set up, click “Submit” to enable new settings.(Note: This item requires support of extension module or local SIP service provider).
6. Advanced
Click “Advanced” icon on the interface to enter into the following interface:
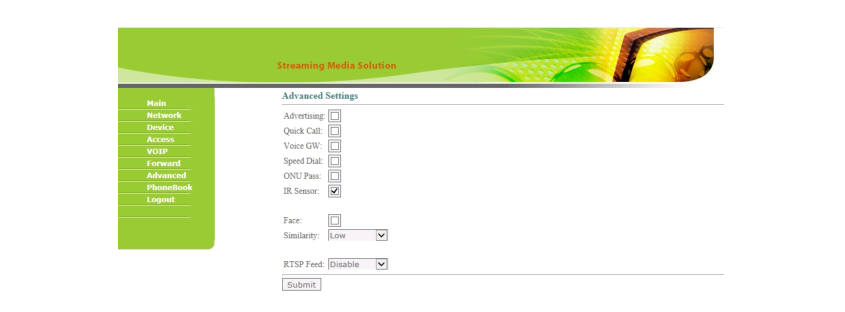
Advertising: check the box to enable this function. Enter the specified advertisement URL in the box. The interface will play the online advertisement automatically.
Quick Call: check the box to enable this function. It refers to the call to master station. Enter the SIP address of specified master station. The call can be from indoor monitor or SIP internet phone of other manufacturers.
Speed Dial: press one number key to give a direct call.
Face: check the box to enable face recognition function. There are three similarity levels for selection: low, normal or high.
Once this is set up, click “Submit” to enable new settings.
7. Logout
Click “Logout” icon on the interface to enter into the following interface:
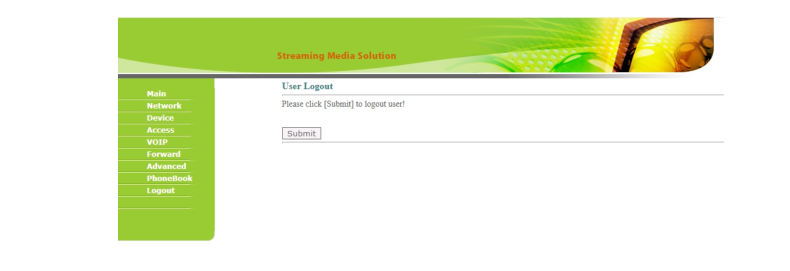
Click “Submit” icon to log out of the system.