Register
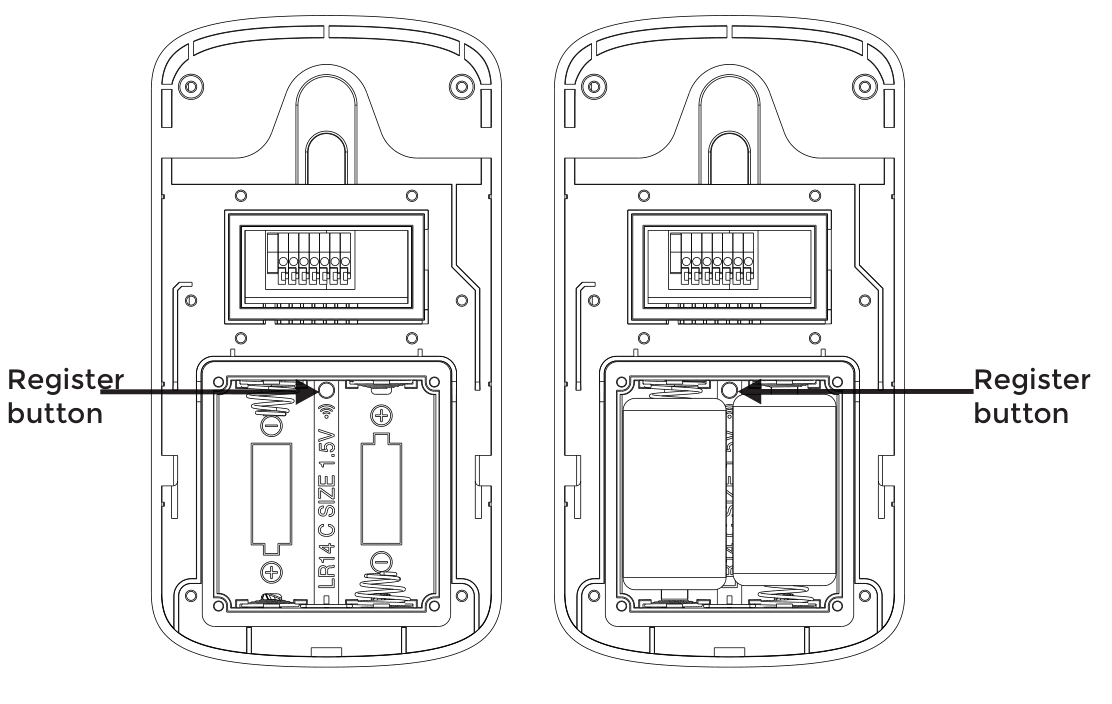
1. Firstly, insert the small screw driver on  position inside the battery compartment of door camera for 3 seconds. It will give an indication tone and the backlight of call button will lighten. Secondly, press
 beneath Menu on the indoor monitor, select the Register menu, press Up
  or Down
 to choose one door camera (1-2 are selectable) that you want to connect, and press
  beneath “
 ” to confirm the settings. Then the door camera will automatically search for the indoor monitor which needs to be registered. When the indoor monitor gives an indication tone, it means that it is registered successfully.

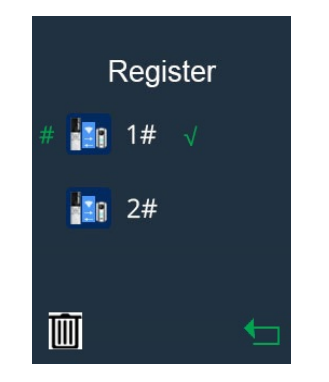
2. Pressing beneath the Menu and then selecting the Register menu, the system will enter into the following interface. It indicates that the indoor monitor is registered successfully.

3. If you want to delete the registration, you can press beneath
 . The display will show "
 ?", press
 beneath
 to confirm. Press beneath
  to return to the main interface.
Notes:
1. The registration of door camera can be up to 60 seconds.
2. The registration of indoor monitor can be up to 20 seconds.
3. The product can support max. 2 door cameras and 2 indoor monitors. Power Saving Mode
1. If the door camera is battery-powered, the indoor monitor cannot enable monitoring function with factory default. Press Register button for 3 seconds and make the door camera enter the registration status. Press Register button again for 3 seconds. The door camera will give “bi-bi-bi” tone and switch from power saving mode into power consumption mode. Then the monitoring function is available for the indoor monitor.
2. In registration status, press Register button for 3 seconds. The door camera will beep and switch from power consumption mode into power saving mode. In this case, the monitoring function is unavailable.
3. Function Details of Device in Different Power Supply Modes:
